Sunday, June 30, 2013

Dryer Balls: How They Work and How to Scent Them

I have been really excited to try out the DIY dryer balls (click link for instructions on how to make them) I really wanted to have something natural that would make my clothes smell fresh, reduce static cling, and help with wrinkles. I was hoping this would do the trick!

It took a few tries of playing with the essential oil ratio to really get the scent to work well, but now it's FABULOUS!

This also works great for static cling, wrinkles, and they do help with drying times of smaller and medium sized loads. I didn't really notice a difference with drying times of bigger items like blankets and the scent wasn't as noticeable either. I think I may need more than three balls! {grins}

Adding scent to DIY dryer sheet alternatives is really easy and it smells soooo good! #laundry #DIY

As for the smell- they work but you need essential oil. I ended up making two batches-- one for me and one for the man because he didn't want his clothes smelling like girls. Hmph.

I use about 5-10 drops of essential oil per ball (more with weaker scents and less with strong scents) 

With these amounts, the laundry has a nice mild scent that I can't get enough of! It isn't overpowering at all-- just perfect. The scent is more noticeable with smaller loads and with the more balls that you use, so you can play around with it a little bit to find your preference.

Here are some ideas for scents:
Mint and Orange
Lavender and Rose
Grapefruit and Lemon
Rosemary and Lavender
Cinnamon and Orange
Lemon and Basil
Spearmint and Eucalyptus
Lime and Stress Away

But lately I've been loving the essential oil Joy from Young Living. Soooo good!

This is How You Do It
  • 1 Large Mason Jar or Container with a lid
  • 3-4 Dryer balls
  • Essential oils of your choice
I used 10 drops of essential oil per ball when first scenting the balls-- you can use one essential oil or multiple essential oils-- that's up to you!

Put the drops in a jar and shake it around so they blended together and coated the side of the container. Place the dryer balls into the container and shake it around so the balls could be coated in the oils. Depending on what essential oils you chose, you will have to play around a bit for the desired level of fragrance you want your clothes to have. 

I leave them stored in the container to help keep their scent. When it starts to smell dull, then I add a few more drops of essential oils. If you want to change the scent, then continue to use the balls until the scent wears off and start the process all over again! Easy Peasy, right?

Update: Essential oils that are not 100% Therapeutic Grade should not be ingested and probably should be avoided topically. I have had several complaints of rashes, eczema like symptoms, GI distress and other symptoms from using oils that are not therapeutic grade. I recommend Young Living essential oils.

Wanna Go All Natural For Your Laundry?  
DIY Detergent (No Borax)
Laundry Spot Remover
Dryer Balls
Soap Nuts
Fabric Softener 

And a bonus read: 7 Dangerous Chemicals Lurking In Your Laundry

The Dirty Truth: Coconut Oil as a Facial Cleanser

Okay, okay... I know. The idea of smearing oil all over your face is completely the opposite of what many of us grew up learning. I know. It's weird.

I mean most of us grew up with the idea that oil was the cause of our bad skin. I thought that the more I could get rid of oil, the better I would look and that belief lead me to years of buying prescription medication, cleansers, and lotions that said "oil reducing". I spent a ton of money and my skin only got worse! Eventually, I gave up all the expensive oil stripping products and things started to get better.
Cleaning with Coconut Oil #beautyDIY #OCM
Okay, maybe it wasn't exactly that easy. But there was enough of an improvement that I began to wonder if oil wasn't so bad after all.

I did a lot of research, but part of me was still very hesitant to try it. I somehow just knew that if I used it, then I would wake up the next day with a face full of zits. I bet that's how you feel too, right?

Oh, the horror!! 

Seriously, it took me months to grow enough nerve to try it. Yes, I know. I'm a wimp.

I was such a wimp that I decided to start experimenting with coconut oil in other ways. I made deodorant with oil. I know. It's weird. But it worked! My pits smelled fabulous and there are no zits. Sweet!

I tried other beauty products with coconut oil and each one worked great. I didn't break out anywhere on my body, plus my skin was smoother and softer. I became a believer! It was time to start using coconut oil to clean my face.

Why Coconut Oil Is Good For Your Skin
  • It has antibacterial and antifungal properties (goodbye acne and eczema)
  • It won't change the pH of your face so it's not irritating
  • Lots and lots of antioxidants to help diminish fine lines and wrinkles
  • Great natural moisturizer
  • It tricks skin into thinking it has enough oil to slow down oil production while locking in the moisture.
  • It's been shown to work for all skin types although some people may be more prone to break outs using only coconut oil. If you break out then you can mix it with other oils like castor oil or jojoba oil.
Even celebrities use it! Heck yes, I want to look like Gisele Bundchen and Gwyneth Paltrow!!  If it's good enough for them, then it's definitely good enough for me! Also, I found out that ancient nobility (Pharaohs, Roman Emperors) used natural oils commonly for skin cleaning and moisturizing. If oil is good enough for models, celebrities, and ancient royalty, then I suppose it's good enough for me. {wink}

The one thing I will impart with you as IMPORTANT is that you buy a good quality coconut oil.

You should look for a coconut oil that is unrefined, 100% coconut oil, and preferably organic. Remember this stuff will be entering your pores and hydrating your skin-- this is a time to splurge a little! Get the good stuff!

Your face will smell like vacation.

What You Need:
Step 1: gently massage the coconut oil to your face (~30 secs)
Step 2: apply warm towel onto your face (to open up the pores)
Step 3: wait 15-30 seconds or so and then lightly remove oil with washcloth-- no scrubbing!
Step 4: if you feel like you need it, splash some warm water to remove excess oil, but your skin should absorb most of it. 

coconut oil for OCMDone! See-- not so hard, right?

The warm cloth will open up your pores and allow the coconut oil to go inside and push out all that dirt and yuck that's inside.

Overtime, coconut oil is supposed to help even skin tone and reduce the size of your pours. You can also use this in the shower, but I don't recommend washing it off right away. Let your skin absorb it for a few minutes before you try to remove any excess oil.

You can also add other oils into the coconut oil for additional benefits. I've seen multiple websites that recommends mixing the coconut oil with carrier oils, especially castor oil at a 1:1 ratio.

You can use carrier oils such as....
  • Almond oil or Grapeseed oil for oily skin
  • Sunflower oil or Aragan oil for regular skin
  • Avocado oil or Apricot oil for dry skin
  • Jojoba oil for all skin types, but especially acne prone skin
  • Castor oil for all skin types (but is more likely to cause drying and sensitivity than other oils)
Don't be afraid to experiment!

Essential oils
You can add essential oils to your coconut oil to get added skin benefits. Just make sure to dilute them. You can use as little as 1 drop per tablespoon of coconut oil, but I like mine stronger by using 1-3 drops per teaspoon of coconut oil.

I recommend using therapeutic grade essential oils because other essential oils are more likely to cause a reaction because they are not meant to be applied directly to the skin. Did you know that only 10% of an essential oil actually needs to be 100% plant matter to have "pure" on the label! Blasphemy!

If you want to learn more about essential oils, you can check out this post about essential oils.


Trouble Shooting
There have been reports of increases acne with the use of coconut oil in some people. Other people have great results, so you'll have to see how your skin reacts to the coconut oil. If you do notice that you start to break out, then I've read that people will often replace the coconut oil with jojoba oil or mix it with castor oil which greatly improves the symptoms.

Storage
I recommend putting a little coconut oil in a container with a lid so you can freely dip your fingers or put a cotton ball into it.

It can be stored at room temperature. It does NOT need to be refrigerated. It will last years at room temperature, but since you will be introducing objects or fingers into the coconut oil, I recommend that you use your best judgement. Even though coconut oil has antibacterial and antifungal properties remember that your fingers harbor bacteria so you probably don't want much more than a few weeks supply in your storage container at at time. Sorry, I'm a total germaphobe.

You should not store coconut oil in anything that doesn't have a lid that easily comes off or that you can  not stick your fingers into because it can be a liquid or a solid or something in between. Coconut oil has a melting point (anytime the temperature is above 75 degrees) so the consistency will change throughout the year. It's summer and I have seen it as both a liquid and a gel consistency, but I know from using coconut oil that it can become solid when it's colder. However, it easily melts when it comes in contact with heat (like your hands).

The Dirty Truth is...
I know that this isn't for everybody, but a lot of people really love cleansing with coconut oil and they have seen tremendous results. But it can cause comedogenic acne in quite a few people (which are tiny clusters of small, hard pimples) and if that happens you should change what you're doing! You can keep cleansing with oils, but you should either change oils or blend the oil with another carrier oil. Some other people have a tremendous about of acne with OCM and that doesn't mean that OCM isn't for you- it means you have to experiment more with different kinds of oils and ratios

HAVING TROUBLE WITH OCM?!  READ THIS: Blending Oils and Troubleshooting OCM

If you'd like to join my Natural Living Support Group on Facebook please fill out this form or you can read DIY Beauty Basics 101

I can NOT give personal recommendations or treatments because I am not a medical doctor. THANK YOU!!***

Just keep in mind that most people who try OCM can get great results, but they may need a little trial and error to find their perfect formula. Below this post there are some great comments from many of my awesome readers who shared their experience with OCM-- I really recommend browsing through them to get an idea of what kind of results you can expect. Please leave a comment or email me if you have a question, but please-- do not ask me for a blend specific to your skin type, you know your skin better than I do-- listen to it and it will tell you what it wants!

Friday, June 28, 2013

Primal Cravings: One of The Best Cookbooks for New Paleo Dieters

I literally just ate these pancakes less than five minutes ago and I was so impressed that I wanted to tell you about them immediately!

#GlutenFree Pancakes from Primal Craving #Paleo

Thursday, June 27, 2013

DIY Avocado, Honey and Coconut Oil Facial Mask for Dry Skin

Okay, okay. I know this is shocking, but I got tired of looking for a recipe for a face mask so I just made one up. So unlike me, right?

This recipe was inspired by my love of avocado and honey and the fact that I believe that if you won't eat it-- then don't put it on your body. I seriously need to make a chocolate body wrap.... Mmm... chocolate...


Tuesday, June 25, 2013

Review: DIY Coconut Oil Deodorant

I live in central Florida and it's the end of June. It's hot. Like 95 degrees hot, but feels like 103 degrees hot. It's I sweat when I go outside to get the mail hot. It's I burn my feet on the pavers and do a crazy jumping dance if I go outside barefoot hot.

I hope I made my point: it's hot.

Since I started using the DIY coconut oil deodorant, I have walked the dog, gone to the gym, did some gardening and yard work, and I even laid out to attempt to get a tan. In all these occasions-- I did have some sweat under my arms, but I NEVER smelled. I consider that a win.

I have been using Tom's and Arm and Hammer Deodorant for about a year and this really blows them out of the water. I am so happy that I made this recipe and I will continue to use it again and again.

It appears clear in the skin and doesn't stain clothing. In the summer it'll be more liquid than solid because the coconut oil has a melting point above 75 degrees. Once it gets below 75 degrees it should become a soft solid that will be more like a lotion.

I use a popsicle stick ($1 for a pack of 100 at the dollar store) to stir the deodorant and then apply it only using a small amount. I was shaking it and using my fingers to apply, but honestly I didn't like doing it because it seemed like the baking soda would be clumpy after shaking and then my fingers felt gritty. Stirring it really helps to mix it evenly and I don't notice the grittiness on my arm pits at all.

Just a thought: I am changing the popsicle stick often and when you need to make a new batch I would switch out the jar for a new one or run it through the dishwasher first to kill any bacteria.

I'd definitely recommend this recipe to anyone who is looking for a natural deodorant.

Click HERE for the recipe OR you can click HERE for the updated recipe where I added clay.

Crunchy Betty wrote a great article on trouble shooting problems with natural deodorants so check it: The CrunchyBetty way to Trouble Shoot Natural Deodorant Issues. Thankfully, I haven't had any issues, but I will probably implement her tip on doing a apple cider vinegar and water application to restore the pH in the pits.

Saturday, June 22, 2013

Natural Dryer Sheet Alternative: DIY Wool Dryer Balls

Oh, Lordy-- what's she doing now. Um, I'm playing with dryer balls, of course! {rolls eyes} If you haven't tried these-- you absolutely have to!!! They are amaze-balls. Literally.

Wool Dryer Balls DIY
I looooove good smelling things so, of course, I used to be obsessed with fabric softener and dryer sheet. But what most people don't know is that the wonderful smell is actually a lot of toxic chemicals. And I didn't love that so much.

For a while, I was using vinegar to squirt on my clothes as a fabric softener, but that wasn't doing it for me. I was still always missing the fresh, lovely scent of newly dried clothes. And that is the reason why I started to look into wool dryer balls. I can SCENT THE BALLS!! {does the happy dance}

So, obviously, I'm thrilled about the whole fresh smell thing, but the more I looked into the wool dryer balls the more I realized that these balls really kick butt! They help to quicken drying times by around 25% (varies on your dryer, clothes, the amount of balls you use). That's not only great for the planet, but that's also pretty great for the wallet. {Dreams of shoes}. They also have zero chemicals so it's healthy! Have you looked at the EWG's rating of cleaning products? If not, go look up your dryer sheets. It's disturbing.

Friday, June 21, 2013

Ham and Cheese Sliders Two Ways: Regular and Dietary Restricted (lacto-free).

The Man was having a bad day and he asked for his favorite lunch so who am I to say no?!

He LOVES Ham and Cheese Sliders. I don't love all the calories and dairy so I make it two ways because we both have different dietary needs

  • Regular: full butter, real cheese, and Hawaiian Rolls
  • Lower Carb/Non Dairy: Earth Balance Butter, lacto-free cheese, potato rolls (some are gluten free-- read the label!) or another type of gluten free rolls

Buttery Ham and Cheese sliders

Thursday, June 20, 2013

BarkBox Review: Monthly "Samples" of Dog Treats/Toys

My dog, Hercules, is such a happy dog and he gets sooooo excited when he gets a treat or new toy. When I heard about BarkBox I thought that this would be perfect for him! When you sign up you will receive a box every month that has treats, toys, or chews that are healthy products and they try to make sure the majority of their products are made in the USA. They even make a point to try to send natural or organic products, although not all of the items will fit into this category.

It's a really good deal when you buy a subscription because the amount of things you get in one box would cost more than the box itself.  They even give 10% of their earnings to charities for help pups in need.

barkbox review

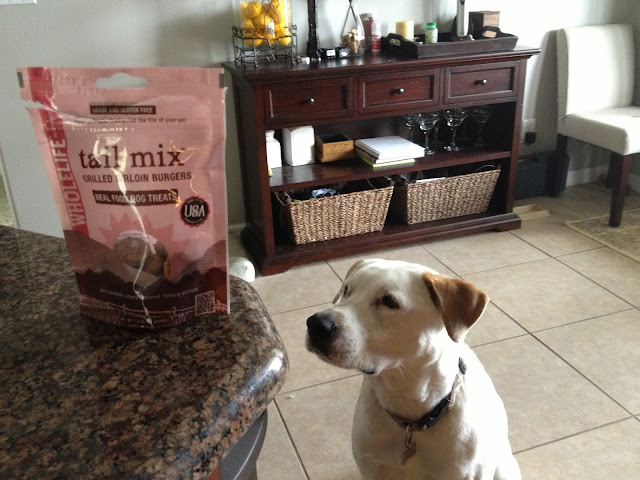
This was our June BarkBox-- the cat was even jealous! We received a full back of Natural "Puptato Chips" ($5), Calm K-9 wafers ($13), Organic WholeLife Trail Mix Treats ($6), Bowser Beer ($3), and a huge meaty bone ($7). Total Value: $34, Total Cost: $19.99 with free shipping.

It's definitely a good value... but does it have good quality items my dog would actually like?

Let's take a look...

What is in a bark box

He was so focused on that bag. He knew that delicious things were inside! He loved it! 

My dog loves his barkbox

DIY Lavender and ACV Hair Rinse

I have to say this first because it's important: remember that when using an ACV rinse, that more vinegar is not necessarily better. Most of the problems that I've heard from readers were from using too much ACV! Please start with this ratio:

1 cups of water to 1 TBSP of apple cider vinegar (ACV)

DIY Lavender ACV Hair Rinse with Essential oils for dandruff or thin hair #DIYbeauty #HairYou can use that recipe alone, but you can also add other ingredients (essential oils, herbs) to the based to get a specific response or scent.

For example, I changed the original recipe a few times by removing ingredients and adding news ones, but eventually I found out that I'm happier with my base plus lavender and the additions of essential oils to help my thin hair and dandruff.

I found that this new recipe works better for the dry, itchy scalp without sacrificing any of the other benefits that I have found from this rinse.

Feel free to tailor this recipe to your hair concerns by using the essential oils I listed below to get the response you want.

For instance, if you don't have dry scalp, then you can use this recipe without the tea tree oil. If you do not have a problem with hair loss, then you can remove the cedar wood.

It's really easy!

Recipe for Hair Rinse:

Wednesday, June 19, 2013

Trash Can Fancy: Vinyl Project

I am all about spending the least amount of money possible and getting the biggest bang. The Silhouette Portrait has helped me tremendously in doing just that! You can see some of the other projects I've done here: Vinyl Projects but I thought I'd run through the basics on this post about how I made this boring trashcan into something with a little more character. You can do it with anything really! Mirrors, glass, boxes, walls, plastic... the list goes on!

I bought a cheap trash can for the guest room and I wanted to apply vinyl to it give it some personality.

Vinyl on trashcan
Here is how you do it...
First, find something cheap:

Using the Silhouette software (or whatever brand you have) build your image. This is where you can be as creative as you want to be. You can insert pictures, symbols, use fancy fonts or anything else that represents your own personal style.

My design for the trash can is the combination of a FREE font and an embellishment that I purchased on the online store for $0.99.
The Silhouette software measure the design size for you so all you have to do is drag the edges to the size and shape you want your design to be. 
Cut out the size of vinyl you need (a little bigger to be safe) and place it on the sticky cutting mat in the same place as the design on the screen. Just use the boxes as guides for your vinyl placement. 
Line the edges of the mat up with the white rollers and push the top button which "grabs" the cutting board and brings it to the cutting device. 

Simply click the send to silhouette button and press "Cut" and wait for the machine to do it's magic.

Tuesday, June 18, 2013

Chopped Asian Chicken Salad with Peanut Dressing

I love crunchy salads. I love easy salads. I love meat in salads. I loooovve this Chopped Asian Chicken Salad.

It has great texture, complex flavor, moist chicken and a creamy peanut dressing. Every bite is interesting and different and it tastes like something you'd get at an Asian restaurant, but better.

In my opinion, there are only a few salads can stand up as a meal on their own, but this one does the trick! Delicious.


Monday, June 17, 2013

DIY Simple, Cheap Shabby Chic Headboard

The Man's mother is coming for a visit soon which has forced me to amp up on my guest room revamp.  I really have been inspired by people using shutters and pallet wood as headboards, but I couldn't find any affordable shutters and I was having trouble finding nice looking pallets, so I decided that I would just make my own from supplies at Home Depot.

Of course since I'm a newbie at the whole making furniture thing and I'm also kind of broke, I decided to take it easy and design something that would be simple and CHEAP.

The end product looked like this:


I already had the paint, sand paper and caulk, but everything else cost me less than $30 to build this headboard.

What you need:


  • 5- 1x6 boards cut to the dimension of your bed frame. This is a full bed so the boards were cut to 53 inches. 
  • 2-- 1x4 boards cut to the length of your headboard including any gaps between the boards and if you want them level with the headboard or if you would like them to be a little lower. This is all preference.
    • Our headboard length of the 1x6s (without gaps) was 27.5 inches. We added 1 inch for the total of all gaps, but I wanted the vertical boards (1x4)
      slightly shorter than the total length of the headboard so we subtracted an inch so I would have 1/2 inch difference between the headboard and the vertical board on both the top and bottom. Therefore, the vertical boards were cut to 27.5 inches. Whew! I hope that made sense! 
  • Wood Screws (I used 1 1/2 inch)
  • Anchors with screws (size 8, 1 /3/4 inch length)
  • A Level
  • Paint (either spray paint or actual brush paint)
  • Sand paper (recommend at least medium)
    • The more rounded you want your edges, the higher grit you should use. A rough sandpaper will help you get the soften look faster, but then you'll need to go back over it with a fine sandpaper to smooth out the roughness. With a medium grit sandpaper, it isn't necessary to go back over it with a fine sandpaper, but you can depending on your preference. 
  • Caulk 
Start by sanding because that really is the most important step! 

I used a medium grit sand paper for the edges and I was aggressive because I like them to be a bit rounded so they are a little softer. 

I used my hand held sander because it's much easier on the hands. I love that thing! If you can, it's also nice to go over medium to heavy grit sand paper with a finer sand paper to smooth things out anyways. 

While I did all the sanding, the man was cutting the 1x4. He is amazing when it comes to wood work! I swear he can do anything. I told him that I wanted it to look softer and within a couple of minutes he hands me a board and says "Is this good enough"? Perfection.

I'm a lucky girl. I can't tell you how he did it and he says he can't tell you how he did it because he free handed it without any guides (I told you he was amazing), but I know that you can ask the guys at Home Depot to cut angles for you and I think that would work just as well.


Sunday, June 16, 2013

Granny's Easy Chocolate Trifle Recipe

My Granny is the ideal southern Grandma. She's sassy, smart, and she makes a lot of awesome food.

This is one of her "easy cheater recipes". It is one of the most simple, delicious recipes for chocolate anything you can make. It doesn't fall into my normal dietary scope of organic, non-dairy, and healthy. This is flat out bad for you, but in such a good way.

But let's be honest. Dessert isn't meant to be healthy. It's meant to be delicious. And this is delicious. 

Granny's Chocolate Trifle 
Chocolate trifle

Saturday, June 15, 2013

Build a Craft Table in the Closet (It's Cheap and Easy! Do It!)

This is a project for all you closet crafters...

Muahahaha! That was my attempt at a bad joke. It made me giggle.

Ok, so seriously, I don't have a huge house and I have to maximize space so my guest room doubles as a craft room. Since I have to put a bed in there, I don't really have enough space to set up a table in the room. Oh, what to do?!

The only logical thing to do: I took the closet. Guests don't need closets. Psh!


This is my first completely from scratch work project that my brain (and only my brain) has planned so I made it pretty simple so it would go easily!! Usually I consult "The Man" and he will draw up a plan for me and tell me what to buy, but I wanted to do this myself and impress him since I had so much fun impressing him with my build: Knock-off Pottery Barn Hyde Console Table.

So, for inspiration I've been looking at pictures on pinterest of people utilizing their closest as a desk space in their office or work room. I really want a place that I can dedicate to sewing, painting and crafting so I decided that I'd do the same in my guest room with a craft table.

What you need:

MDF or wood measured to fit your space
L-brackets for shelves that will go into the support beams of the house
Screws
Sand Paper
Oil-based primer
Paint
A creative way to prop up your board (see below)


I used a rather large piece of MDF: 24x70 for the base of my table. I really want it to look good so I sanded and sanded and sanded and sanded... did I mention I sanded? I learned from previous projects that its often nice to pay attention to the curves of the wood/MDF with the sander to soften them up just a bit.

Also, don't forget to wipe the board off after sanding. I forgot to do that once. ONCE. Trust me, you want to wipe the board.

And then I used an oil based primer in white to coat the table. This stuff is a biotch to get off if you get it on yourself, so be careful. The man tells me that you need some sort of special stuff that I don't have to get it off.

Yes, you want to be taking advice from someone who doesn't care about being covered in paint and not having the items necessary to remove it. It means I'm a rebel and it's totally cool. Right?

I'll assume you said yes.

I am not a neat painter. I get paint everywhere. I was covered in it and I couldn't get it off for days. Hence the sheet under the ghetto tupperware prop to TRY to protect my garage floor. HA!

So why oil-based primer? I read that it's really important to use oil-based primer because if water get in contact with MDF it will swell and that's probably not the look you're going for. I wasn't about to challenge the authority of Google so I bought the oil-based primer.

It takes about 24 hours for the primer to dry so its TORTURE!! After it dried I sanded some more. Blah!!

I decided to paint my table the same color as the trim in my house: Super White by Benjamin Moore. Why? Because I already had it. I wanted white and a semi-gloss. It works. It's free. I likey. The higher gloss you go the easier it is to clean, too, so I recommend at least a satin or higher.

Even after I primed it I had to paint two coats onto the board to get good coverage and then I spray painted it with shellac to seal it just in case.

After that the majority of the work was done!

Next I decided the height of the table and then "The Man" just couldn't stand that I was doing something manly without him so he helped me put the brackets on the wall and slide the MDF into place. We used four brackets and spaced them where there were support beams in the wall. That thing isn't going to budge.

Tada! All done!

I put my crafting supplies, art easel. sewing machine on the table, and silhouette portrait, then added some storage for more supplies. I spray painted a plain pegboard and the wire baskets to hold small supplies like paint, tape, scissors, and other things that I grab often. I found a storage container on clearance (yay!) for my yarn, small decorative piece, scrapbook art, and a few other crafty things. I love it and it fits perfectly under the table!

I repurposed a large basket (I found on clearance at pottery barn for $29) as storage for wrapping paper under the table. I found a set of canvas boxes on Amazon.com for super cheap to use as storage on the shelves and they hide most of my crafting supplies. I can even use them to store some of my smaller painting canvases, but the larger ones I have to put under the table.

I'm going to make little chalk signs to label them with their contents. I thought that might be more practical than using something permanent like vinyl because I change what I store in them so often. I also think cute little chalkboard signs would add a little character to the boxes, too. Plus, I'm a little obsessed over chalkboards. I made two for my house and a third for my bestie's house so I have plenty of chalkboard paint waiting to be used in my garage.

I also found some under the shelf wire baskets in the closet section at Home Depot. They are awesome. I put my vinyl and contact paper in one of them and some other supplies that I use often (glue, paints, small fabric, chalk) in the other.

The Man was so impressed by these little baskets he wanted some for his closet space. Haha! I'm a trend setter! :)

I also used a tension rod to hang up my ribbon in the corner. I love it! I just take what I need when I need it and I can see everything I have at a quick glance. No more looking through boxes! Yay!

Since the room is so small, we took down the original closet doors because since they were the folding out kind they just took up too much room.  I made curtains for the closet so we could close up the crafting area if we needed to use the space for a guest room. I re-used an old chair that I had gotten from Overstock.com for $30.

It still need a little bit of work, but it's getting there!


Friday, June 14, 2013

Product Review: Natural Toothpaste War (Tom's, Jason's, Kiss My Face)

It's time for the Toothpaste War! I wanted to review three different popular natural brands so that I can tell you which is the best!


I've been using Tom's Cinnamon Toothpaste for over a year and I have really enjoyed it. 

The flavor is nice, not too overpowering and it comes in a paste, which I prefer over gel. I've tried the peppermint version too, but I find it too pepperminty for me. The cinnamon is perfect. It requires the normal amount of paste to get a good brushing-- so no extra points for longevity. 

This toothpaste did contain fluoride. 

What I really appreciate about Tom's is that they make sure that you have access to all their ingredients. You can look up items individually on their website so you know what those fancy names mean. The only problem is that they use carrageenan in their paste and gel toothpastes. 

Carrageenan is made from seaweeds, but so heavily processed that the structure is damaged and it's been shown to likely have carcinogenic affects. Some of the big organic companies are pushing for the FDA to remove carrageenan from the organic list. That's reason enough for me to stay away from it!

I was also a little sad that Tom's has Sodium Laurel Sulfate-- it has been known to be irritating and it's not exactly natural.

So, for those reason's I will sadly be giving up Tom's of Maine Toothpaste.

The Skin Deep Cosmetic Database gave it a score of 1 (0-10 and 0 is the best)


JASON'S Jason's Orange, Cinnamon and Mint toothpaste sadly also has carrageenan and it's not even at the back of the list of ingredients: it's near the top.

The flavor is mild and kind of wonderful and my teeth feel really clean, but I can't get past the carrageenan being such a high ranking ingredient. I read that they recently changed their formula and they were using a different thickening agent, but now they are using carrageenan primarily. 

I did see that they do NOT have carrageenan in the gel toothpaste so I ordered cinnamon and  tea tree gel toothpaste by Jason. I found it quite good-- a bit more tea tree than cinnamon, but it was refreshing and mild. You don't need much to get a good clean feeling so this might last quite a while. 

I was a bit concerned about the number of products in the Jason's toothpaste-- many which I didn't know what they were. They did note that their aloe and their tea tree are both certified organic and I appreciate that. They listed stevia in their list of ingredients which I'm not excited about. It's a "natural" sweetener, but it's such a new product so I'm a little iffy about it. I think it's definitely better than sugar, but do I need it in my toothpaste? 

There was no fluoride list in this toothpaste. 

I cannot recommend Jason's paste toothpaste, but do try their gel toothpaste! In my opinion, it is a better natural product that Tom's. 

The Skin Deep Cosmetic Database gave this toothpaste a rating of 3

KISS MY FACE
I purchased the peppermint flavor "Triple Action" toothpaste and it was surprisingly refreshing. It was sweeter than other peppermint toothpaste's I have tried and when I looked at the label I wondered if it was because of the licorice or stevia that was in the ingredient list. Maybe both. I'm still not thrilled about the stevia, but what's a girl to do!?

They also had quite a bit of ingredients that I weren't exactly sure what they were, but many of the same ingredients were used by Kiss My Face and Jason's. Only the aloe is certified organic in the Kiss My Face Product I sampled, but nonetheless, I really appreciated that it has tea tree oil (a natural anti-bacterial oil) and aloe in the ingredients. There was no carrageenan.

This toothpaste was a gel and not a paste, which isn't my preference, but I found that I didn't mind. It required very little gel to clean my teeth so I think this product would last a long time.

There was no fluoride in this toothpaste and it do NOT have carrageenan. Update: It may have carrageenan. It is questionable what "Irish Moss Extract" is, but it is something carrageenan can be derived from! 

CONCLUSION:
Out of these three products I would be comfortable using and recommending Jason's

The Skin Deep Cosmetic Database gave this toothpaste a rating of 2

But I also recommend making your own toothpaste! It's fun and you know exactly what is in it! 

If you would like to know more about the Skin Deep Cosmetic Database check out my post explaining their rating system: How Safe are Your Beauty Products?
Or
Go to their website to see how your other beauty products stack up: Skin Deep Database

Disclaimer: I have not been paid or compensated in any way for this review. This is my opinion of the product. 

Thursday, June 13, 2013

Craft Projects using the Silhouette

Target shadow box mirror that I added
"I will be grateful for this day"
I love all things crafty, so I've been dreaming about getting a silhouette for some time. It seems so easy and you only have to buy supplies which would be cheaper than buying, say, a vinyl cut out from a store. I rationalize that it would cost more if I bought everything I wanted than if I made it, so it made sense that I should buy it right? Right?

I'm just going to assume that you are going to say "Yes, of course. It's so wise, Sherri". So I bought it!

I got the smaller of the two silhouette products (Portrait instead of Cameo), but I couldn't justify the extra money for a few more inches.

Once I made that decision, I made the jump and I am now officially part of the dark side. Yay! :)

The best price I could find was on Amazon.com. $175 for the Silhouette Portrait and the vinyl kit with free shipping. Yay! They also have different kits too if vinyl isn't your thing-- like a cloth kit and a bedazzle kit. My vinyl kit came with a few different vinyls and plenty of contact paper, plus a few vinyl tools. The best part? It included a $35 gift card to use at their online store to buy more designs or fonts.

The package came today and I ripped it apart like nobody's business. I was literally like a 5 year old on Christmas day-- making squealing sounds, throwing wrapper in the air, shaking the box to get stuff out. In retrospect, I'm very, very happy that the man was at work. I'm sure he would make fun of me for days had he seen me going cray-cray over a package.

I ran to my craft room and unpacked, set up, and then started on my first project. Weeee!!!

This is what I learned: Plan your design. Start with something VERY simple for your first project. Like words or numbers. Or maybe one single picture. Don't believe that you are the Monet of Silhouette projects. You aren't. Right now you are a four year old trying to color in the lines.

I had all these vinyl wall art designs with different fonts and pretty symbols planned in my head. My first attempted project failed miserably, so I scratched my elaborate project in place of some organization projects to get some practice. Within minutes, I was labeling everything in my house.
My First Vinyl Project

Weeeee!! So much fun! And it really is very easy once you get passed spending the time to figure out how to work it (watching the instructional video ::yawn::). I'm just dreaming of all the things I will do!

It is soooo simple with the silhouette! You play around with the fonts and designs that you have and you can easily size them to exactly the right size of your project right on your computer. If you don't have what you want then hey have an online store where you can buy additional designs, fonts or pre-made word art for usually 0.99 cents and you can use them over and over. After you decide on your design you simply put the vinyl on the cutting board and send it through the silhouette machine. Out it comes and you simply peel off the unwanted vinyl (it can be tricker with the small, thin fonts but if you take your time it turns out fine). After you finished peeling off the unwanted vinyl you stick the design you want against contact paper, then apply it directly to the surface you want to adhere it too. Rub it a couple of times and peel off the contact paper! Tada! All done! So simple.

They give you a lot to play with for free too as far as designs and fonts. The only thing I bought and used was the design that I used to frame the word "Pantry" (picture below) and it was 0.99 cents! Bam!

Tuesday, June 11, 2013

Hot Summers Need an Easy Homemade Lemonade Recipe.


There is absolutely nothing like fresh squeezed lemonade. It is so distinct that you can immediately tell when someone has taken the extra time to make it. It's one of my favorite things to serve at parties and trust me--- it's always a hit. In my experience people really notice and respond to fresh ingredients especially fresh lemonade.

However, it can be a lot of work to squeeze lemons.

A lot of work.

That's why I bought the KitchenAid Juicer attachment. It fits right into my KitchenAid Stand Mixer (one of my favorite appliances of all time). It really is amazing. What used to take me nearly an hour to squeeze takes me 10 minutes. And it really gets EVERYTHING out of the fruit.

You can't see it so well in this picture, but there is a little basket that sits in the bottom of the juicer which catches all the pulp and seeds. So amazing! If you are juicing a lot, then you'll have to empty the basket a couple of times, but it is well worth it.

I would definitely recommend this to anyone who already has a KitchenAid Mixer because it's my favorite attachment!

I bought mine here: KitchenAid JE Citrus Juicer Stand Mixer Attachment It was a little cheaper and it has free shipping! Yay! I'd really recommend it!

Today I was having some of my cousins over for supper so we could meet my youngest's cousins boyfriend. I think it's best to throw a potential spouse right into the crazy so they know what they are in for! Right?! Right.

I decided to make a double batch which would probably be around eight to ten glasses, but for recipe purposes I'll tell you how to make a single batch (4-5 glasses).

What You Will Need:

3/4 c - 1c sugar (this will depend on how sweet or tart you want it)
1 1/2 c water
6 lemons juiced (approx 1 - 1.5 cup)
2-3 c water (this will depend on how lemony you want it)

On medium low heat put 1 1/2 cups of water in a pot and add 3/4 to 1 cup of sugar. I like mine more tart so I use less sugar. If you like it sweet then I'd suggest adding a full cup.

Stir until dissolved. Remove from heat.

Juice all the lemons hopefully using your super easy juicing attachment.

I took this picture after juicing 4 lemons with my juicer attachment! Impressive, right? You can see how much juice I got AND how clean the lemons are.  I know I'm beating a dead horse, but I seriously love it.

After you juice all your lemons, then place it into a serving container or pitcher. Add 2-3 cups of cold water and 1/2 to 3/4 of the water-syrup mixer, stir and then taste test. It's always better to add too little than too much because you can always add more!

Here are some other recipe variations that you can try that I LOVE....

Sunday, June 9, 2013

GMO, Pesticides and Health: What to look for on labels.

I think many people would agree that it would be best to buy organic products and foods that have not been genetically modified, but for many people this is not always possible! Organic foods are expensive and there are also a lot of misrepresentation in the public about GMOs.

It really makes me mad because we have the right to have access to healthy foods, but this is being jeopardizes through cost and the ever expanding role of Monstanto and GMO crops. A certain type of GMO crops-- the Roundup Ready crops-- have been linked to multiple diseases including autism, ADHD, cancer and parkinson's disease, yet they are still considered "safe" by the US government.

It can be really confusing because things aren't always clearly labeled on the products as organic, non-GMO, or anything really. How do you know if they are safe?

I'll tell you what I normally do when shopping at the grocery store
  1. If possible, by organic. When you buy a product with an organic seal then you know it is also GMO free. 
    1. Still check the labels for carrageenan, a seaweeds substance often found in organic foods to thicken it. There is controversial research showing that it may be harmful. Personally, I'll stay away until the research is all in.
  2. If you can't buy organic, then look for the Non-GMO seal.
  3. If you can't buy an organic or non-GMO verified product, then look for at risk ingredients on the label:
    • Corn
      • Corn oil
      • High Fructose Corn Syrup or Corn Syrup
      • Caramel or Caramel Color
      • Corn Meal, Corn Flour, Corn Starch, or Gluten
      • Fructose or dextrose
      • Vitamin C
      • Modified food starch
      • NOTE: Sweet Corn is probably NOT GM. Only 5% of the sweet corn in the US is GM so most popcorn and sweet canned corn are safe.

Saturday, June 8, 2013

SunBiotics (Chewable Organic Non-GMO Probiotics)

Are you bloated? Do you have gas or irregular bowel patterns? How feelings of anxiety or depression? Acne? Bad breath? Sinus infections? IBS or Celiacs disease? Low bone density? All these things (and more) can be connected to an improper balance of gut bacteria.
Most people don't think too much about the bacteria in their colon, but it's actually a really important system in your body.

Have you ever heard of the "Brain-Gut" link? It's such a cool thing that some people are saying that the gut is the body's second brain. There is research showing that the gut is linked to mood disorders, skin conditions, a decreased immune system, hormonal imbalances, bone density, and a lot of other issues.

A lot of people, including some doctors, don't pay attention to the warning signals that our GI systems are telling us such as when we don't go to the bathroom regularly, if our stools are dark or hard, we are often constipated, or have gas. These feelings becomes "normal" for us and we ignore it.

Friday, June 7, 2013

Easy DIY Deodorant That Actually Works!

Deodorant has been my nemesis. I have never found one that really works and I usually have to buy three different kinds and rotate between them to get good coverage. I've tried all the natural brands and they just don't stack up.

After all, I live in Central Florida and the heat here is insane. I absolutely can't stand carrying sticks of deodorant in my purse so I can reapply. Nope. Not cool

So, I decided to make my own, but I polled a few friends first. One of my old Navy buddies swears by baking soda and cornstarch. It works well-- I tried it a few years ago, but I can't get past the gritty feeling in my pits! 

After much research I read that you can substitute the cornstarch for arrowroot flour-- sounds so much more gentler and healthier (most cornstarch is GMO)! It's so fluffy that it reminds me of condensed sugar. 

What's the most important thing about a deodorant? You don't stink. So that's my priority. 

What causes smell? Bacteria. That's where Tea Tree Oil and Coconut Oil come in! They are anti-bacterial and help control odors. 

DIY deodorant with coconut oil

Thursday, June 6, 2013

Adventures in Painting

I hate painting, but there is one thing I hate more: deciding on paint colors.

God, what a headache!! I spend more time analyzing paint chips than I do actually painting (which did I mention-- I hate).

Now this is preference, but I really, really love Benjamin Moore Aura paint. They only typically need one coat of paint which is awesome because that's less painting. Yay! Because I hate painting. :)

Did I get my point across?

My biggest problem is that I never know which paint colors to choose! And that's when I met my favorite interior designer!

Did you know that Pottery Barn offers FREE in store interior design consults? FREE. There is no minimum sale or gimmicks. It's FREE. Of course, they push their own products, but you don't have to buy anything. But I'll be impressed if you don't buy something. :)

Poor Celeste (my interior designer). She had no idea what she was in for. I came to the appointment with a binder of ideas. Haha! After three hours, I left with a lot more knowledge about colors than I ever thought I could have.

CELESTE'S COLOR TIP #1:
Pick your colors based on your favorite decorative accessory in your home: a pillow, curtains, bedding, or artwork. 

If you don't have one, then she said it's important to find it before you start painting. She said if you find something you love and it doesn't match your color scheme, then you're back to square one or you're repainting your room. 


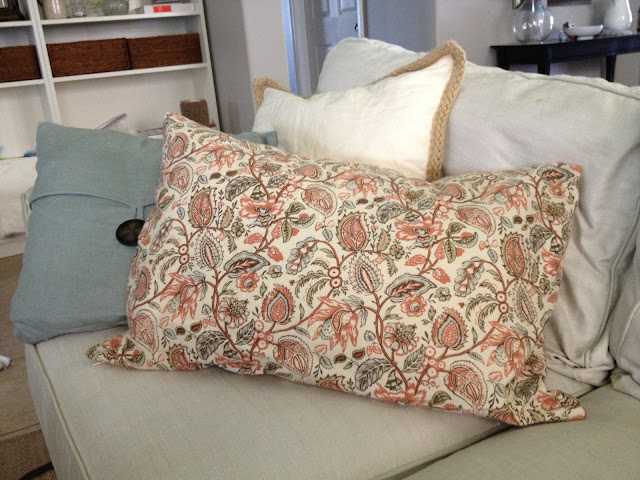
Pottery Barn pillows

I decided on my three main colors based on my favorite pillow, the Josephine Lumbar Pillow. Isn't it pretty? I loved the burnt red, hints of green and the dreamy blue mixed together. 

CELESTE'S COLOR RULE:

To keep a good flow pick only a handful of colors, three maximum, and repeat them throughout the house in different degrees. Neutrals (whites, grays, tans, blacks) can be without taking one of your three color picks. You can even use the same paint in different rooms to bring cohesion to your house.

For example, I used red, purple and blue as my primary colors. I use gray, white and tan as my neutral colors. 

She told me that you should pick a color for the walls in one room and use the other colors for accessories. When you move to the next room, select a different color from your palate, and rotate the accessory colors.

Ex: My bedroom is blue with purple and white accents, the guest room is red with white and tan accents, and the living room is gray with red and blue accents. 

The repetition of colors throughout the house makes things cohesive.

How to Pick Complementary Colors:

When in doubt of what colors to choose -- look at a color wheel.

The easiest way is to pick a color next to your primary color or directly across from it. Let's look at GREEN: 

Color Wheel

If you had a green room, then accents of blue or yellow would be appropriate. Red accents would be a more of a bold statement, but hey girl-- you can rock it. 

CELESTE'S COLOR TIP #2:

When choosing a color, always consider the things you cannot remove (cabinets, countertops, tile) or are too expensive to change (bed headboard, sofa, dining room table). 

She focused mainly on my granite when deciding on a color for the great room. We looked at the granite next to color swatches and put them in a pile if the combination made us happy. It seemed like everything I liked was in the taupe gray family so, obviously, that was the way to go.

Cumulus cloud and Kentucky Haze Benjamin Moore
Ben Moore Cumuls Cloud and Kentucky Haze
In this picture you can see the granite next to the wall color, "Cumulus Cloud" (Ben Moore).

In full sun it looks gray, in a darker room it looks more taupe, and in certain lights it looks like it has a hint of green. You can see a little bit of difference in the wall color in this picture on the left and the picture (above) of the Josephine lumbar pillow-- the walls look darker and more gray in the other picture, but they are the same color.

Celeste recommended that I paint the entire great room "Cumulus Cloud" to make it look bigger. She said that painting each room a different color will actually make the room look smaller and if I want to add color, then use a different color on accent walls or niches or add colorful accessories.

CELESTE'S COLOR TIP #3:

If you want to paint an accent wall, a niche or a door something differently than your trim, a good "safe" rule is that you go up or down on the color swatch at least 2 colors from your main color.

I decided to do just that on an accent wall in the living room: River Reflections (two shades darker than Cumulus Cloud).

Copyright

©overthrowmartha.com by Sherri Griffin, 2012-present. Unauthorized use and/or duplication of this material without express and written permission from this blog’s author and/or owner is strictly prohibited. Excerpts and links may be used, provided that full and clear credit is given to Sherri Griffin and Overthrow Martha with appropriate and specific direction to the original content.

Boring Disclaimer

The contents found on Overthrow Martha are not intended to diagnose, treat or cure. If you have concerns, please contact a doctor before altering your health care routine. If you feel as if you are having any adverse side effects please stop using the product immediately and consults a physician.

Statements on this website have not been evaluated by the Food and Drug Administration.

All affiliate links are used to help keep Overthrow Martha up and running while a portion is donated to charities.

You rock for reading all of that. {pats you on back}